by Rachel Wells
When the weather outside is frightful, winter science experiments are so delightful!
Whether you love it or hate it, winter is here to stay for a while, and that often means months of freezing temperatures and more time spent inside. One surefire way to cure boredom and have fun indoors is with science! It’s messy, educational, hands on, and always fun.
Encourage your child to make predictions, discuss observations, and re-test their ideas if their experiment doesn’t work out the first time.
Check out these fun winter science ideas below:
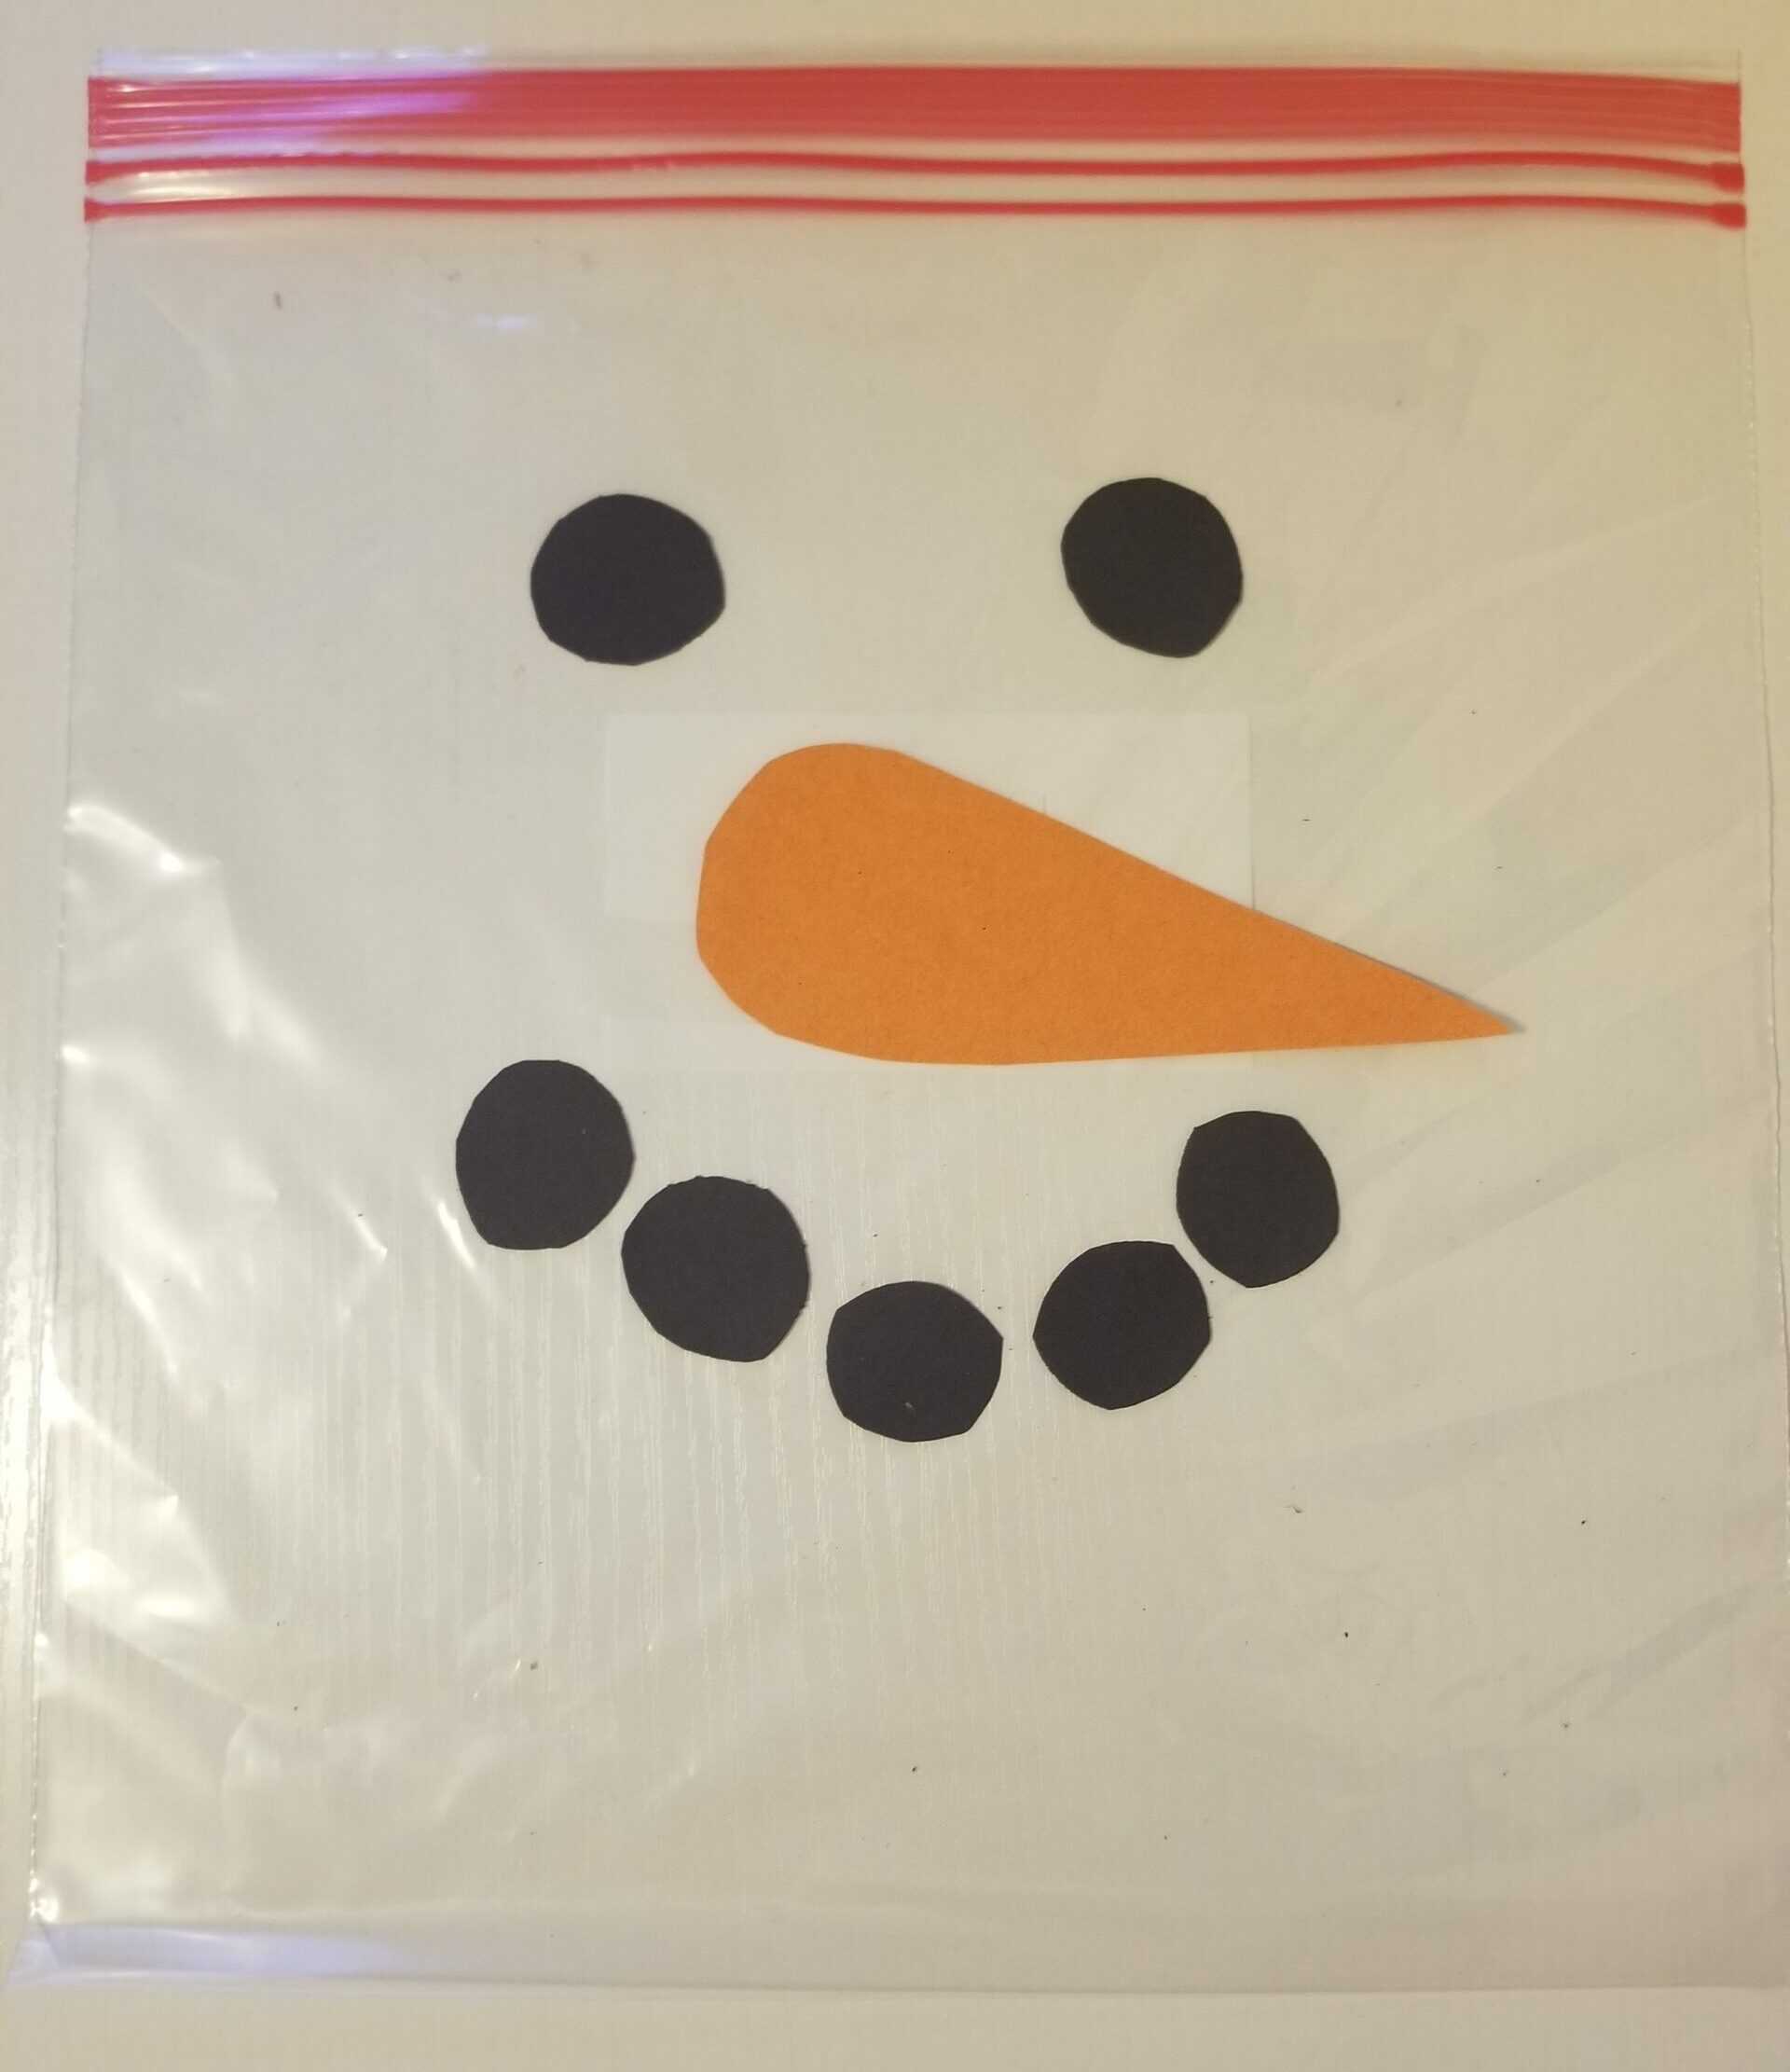
Exploding Snowman
Supplies Needed:
- Ziploc bag
- Vinegar
- Blue food coloring
- Paper towel
- Black sharpie
- Orange construction paper
- Scissors
Step-by-Step:
- Decorate your bag to look like a snowman using the black sharpie and construction paper.
- Put at least 3 teaspoons of baking soda in a paper towel and fold it into a pouch. Gather your supplies and head outside or into an area that you don’t mind getting messy!
- Place the paper towel pouch into the snowman bag, and pour in 1-2 cups of distilled white vinegar (if you choose to use the blue food coloring you will need to color the vinegar before pouring it into the baggie.) Quickly seal the bag!
- Watch as the snowman gets bigger and bigger while the bag fills with carbon dioxide until the pressure is too much and…. Boom!
- You can extend this experiment by trying it with different sizes of Ziploc baggies or different amounts of baking soda. Talk about the differences in the reactions that occur.
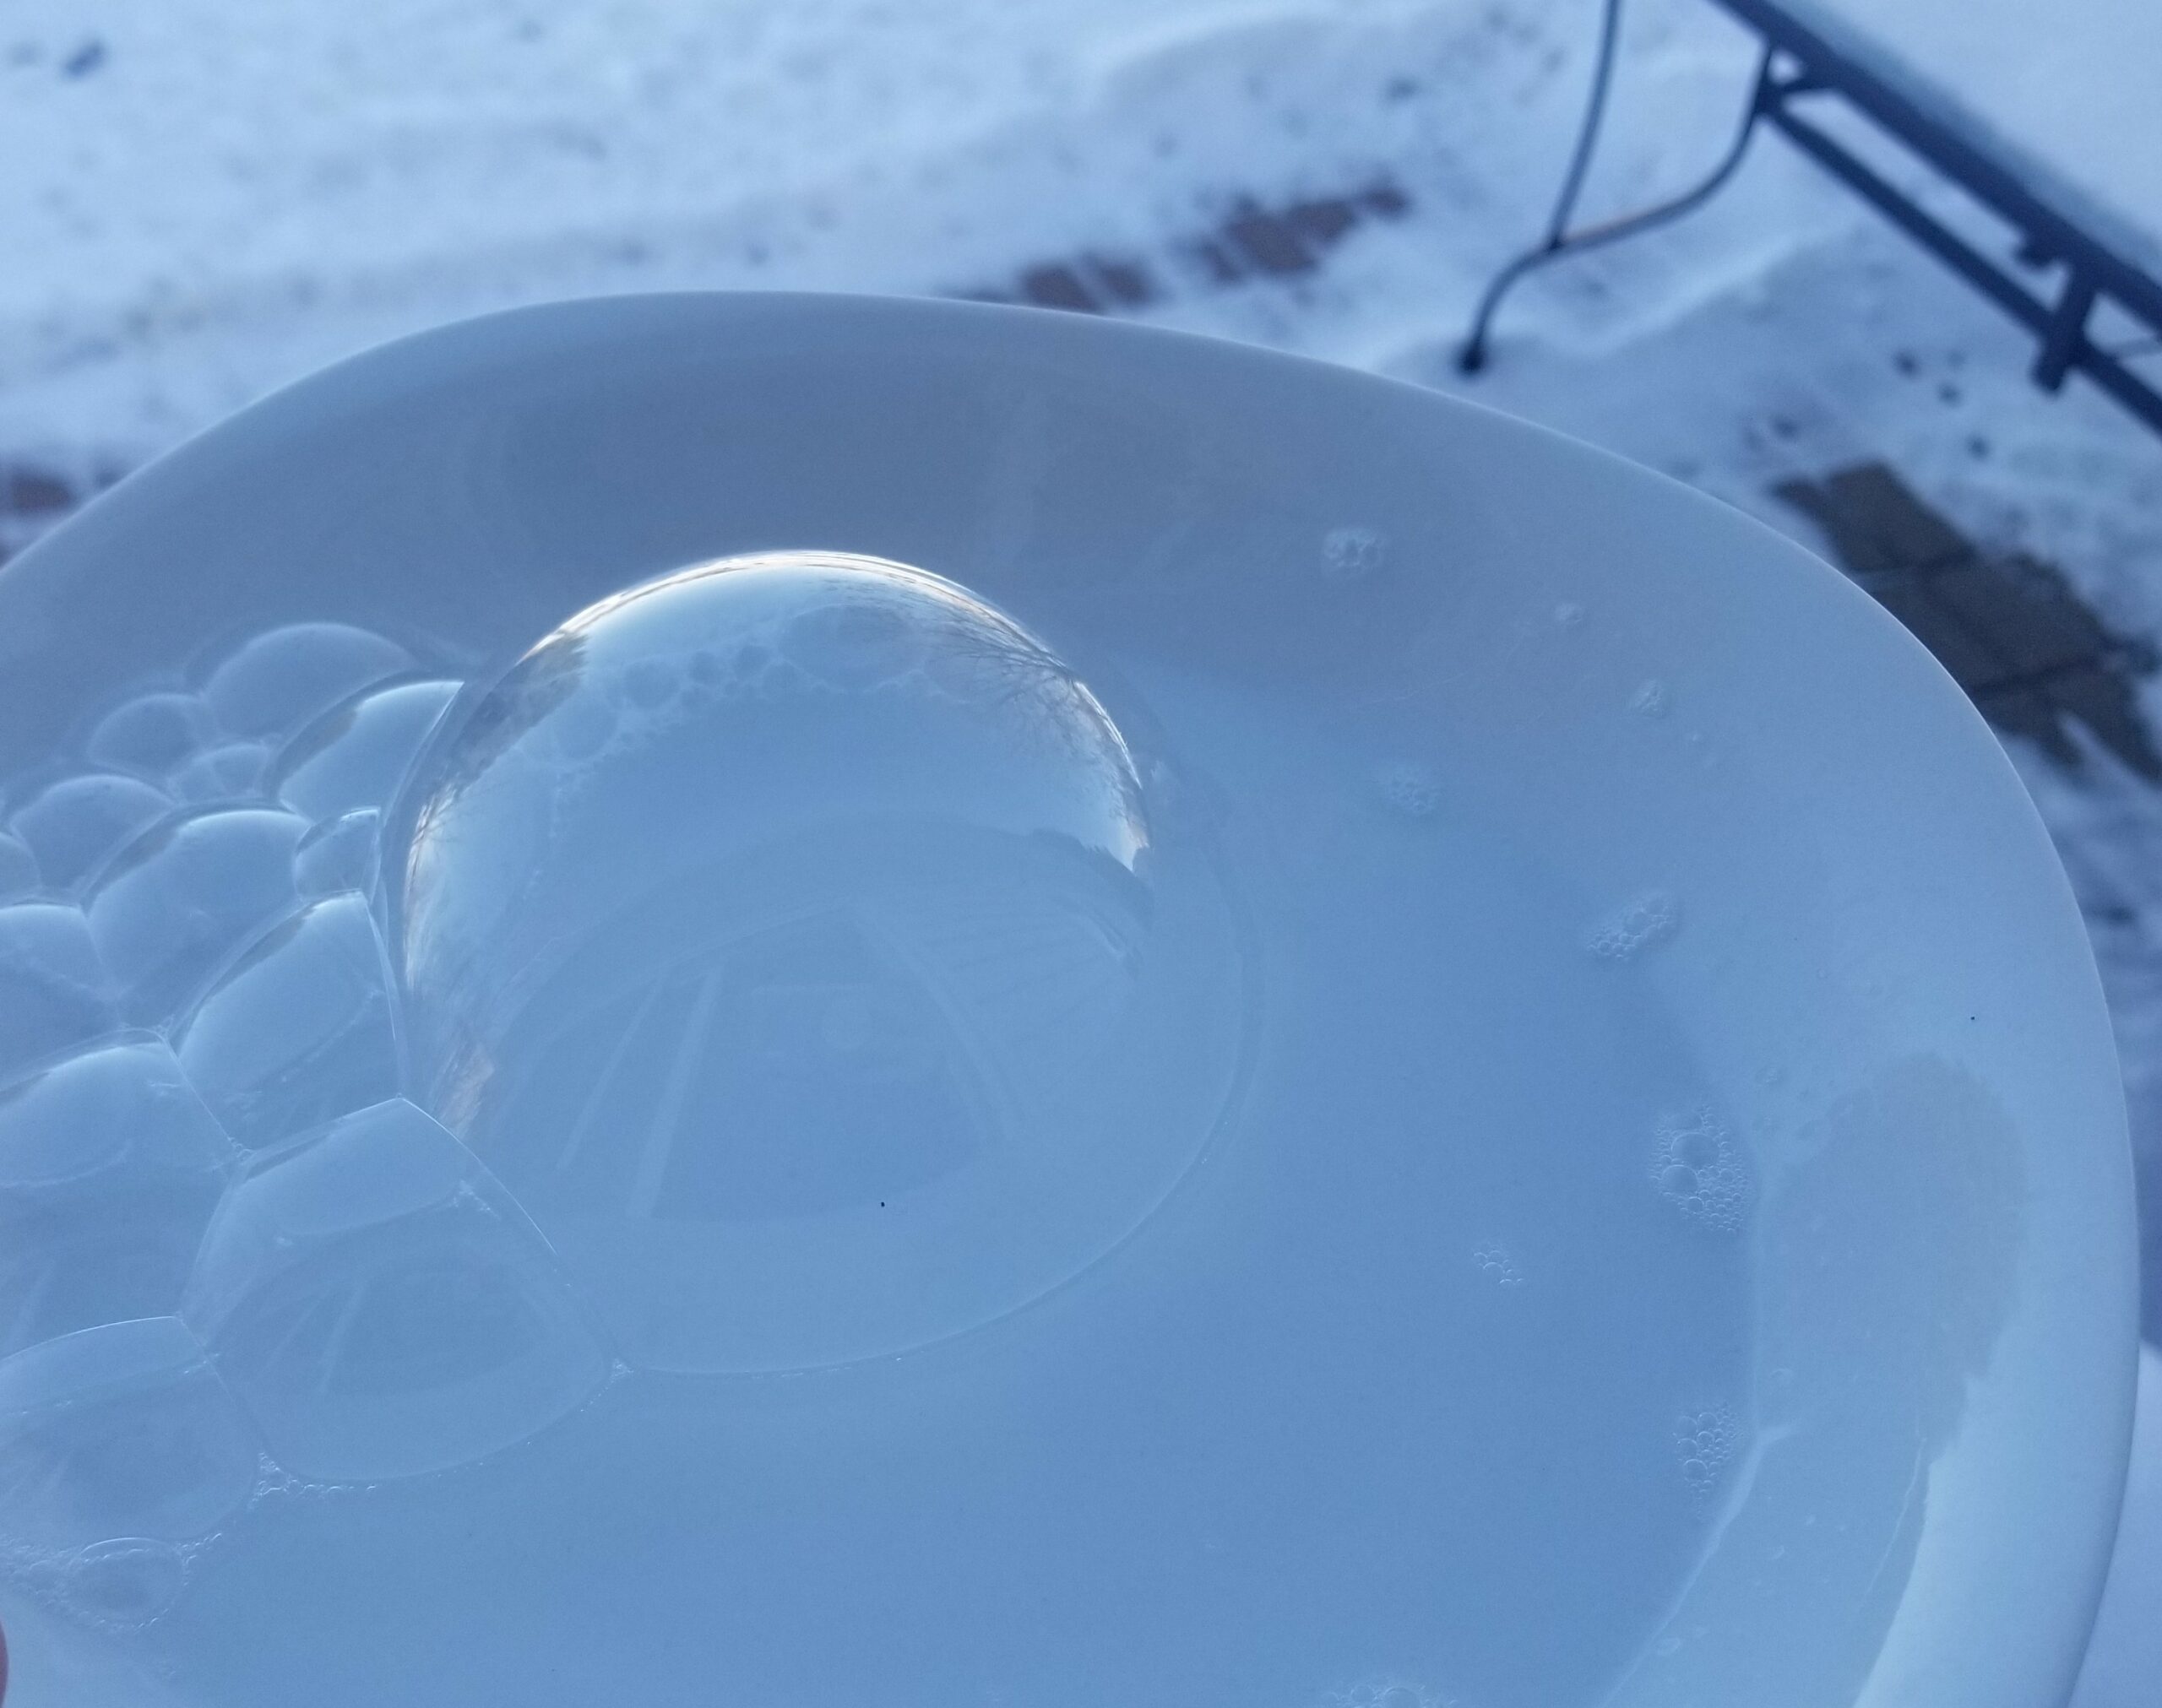
Frozen Bubbles
Supplies Needed:
- Bubble solution
- Bubble wands
- Cold weather/snow
Step-by-Step:
- An ideal temperature for this experiment is around 14* Fahrenheit or colder.
- Chill your bubble solution in the fridge for about 30 minutes – but do not let it freeze.
- Head outside and find an area of snow away from any breezes. Blow a bubble and let it land on a cold surface to watch it freeze and crystalize.
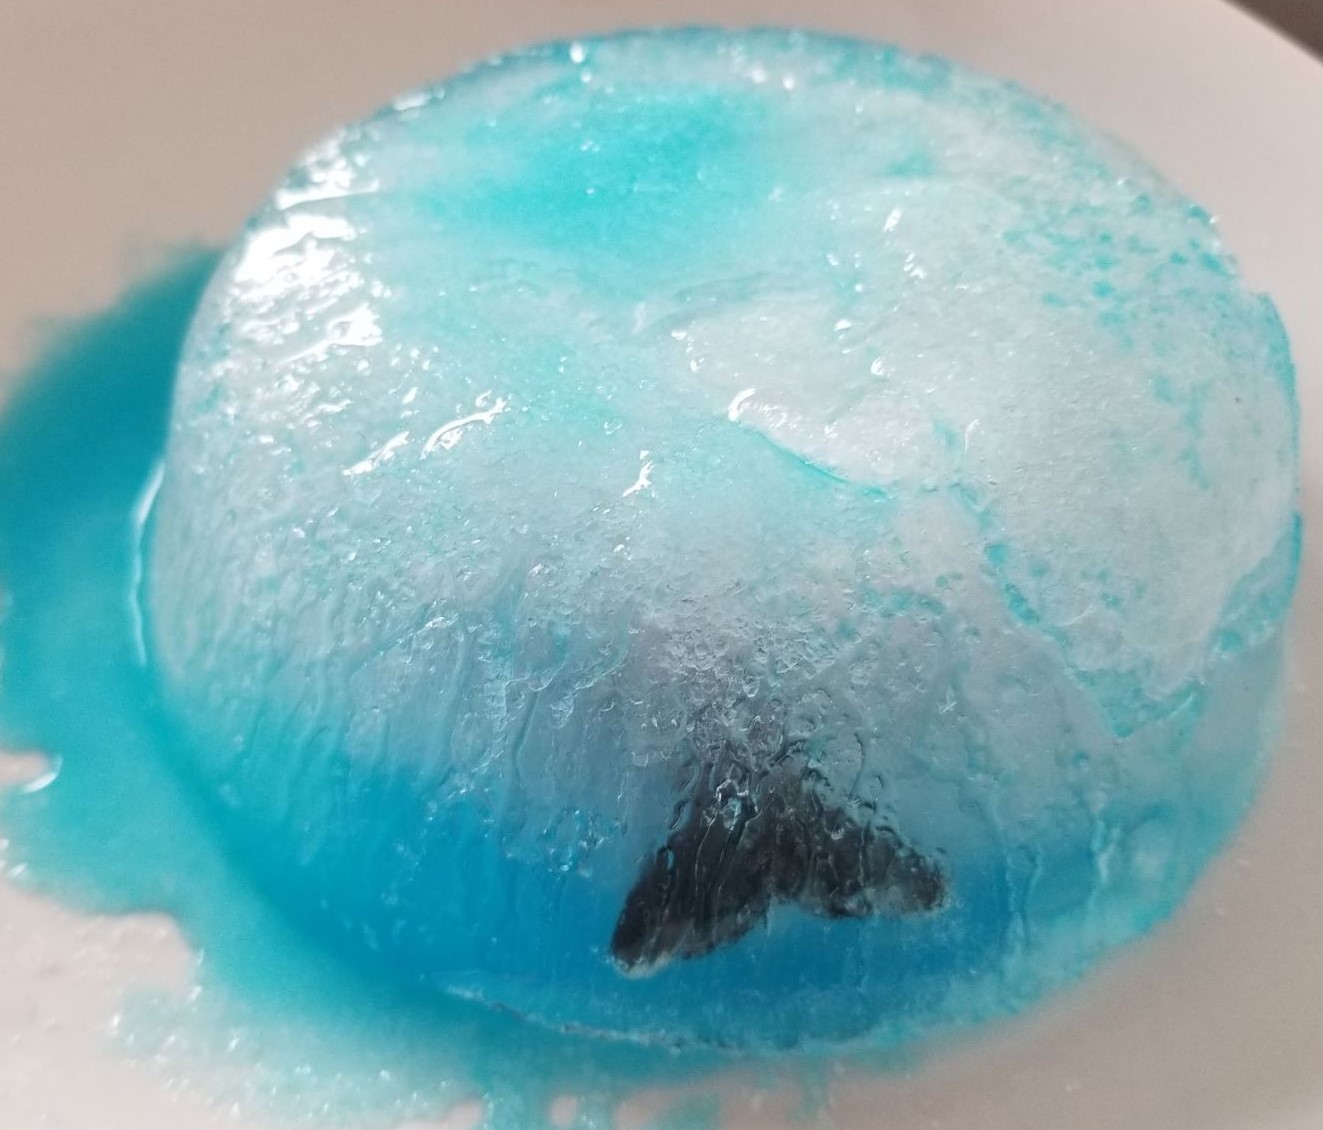
Melting Arctic Animals
Supplies Needed:
- Small toy arctic animal or Lego person
- Bowls (small and large)
- Water
- Freezer
- Eye dropper
- Food coloring
- Salt
- Baking sheet or tray
Step-by-Step:
- Freeze the arctic animals by placing them in a bowl of water, and then placing the bowl into the freezer.
- Once the water is frozen, remove the ice block/iceberg from the bowl and place it on a baking sheet.
- In a small bowl, mix warm water with a few drops of food coloring.
- In another small bowl, add some salt.
- Have your child use an eye dropper to drop dots of warm, colored water onto the ice block, along with a sprinkling of salt, and watch as the ice slowly melts.
- Continue until the arctic animals or Lego person is fully freed from the ice.
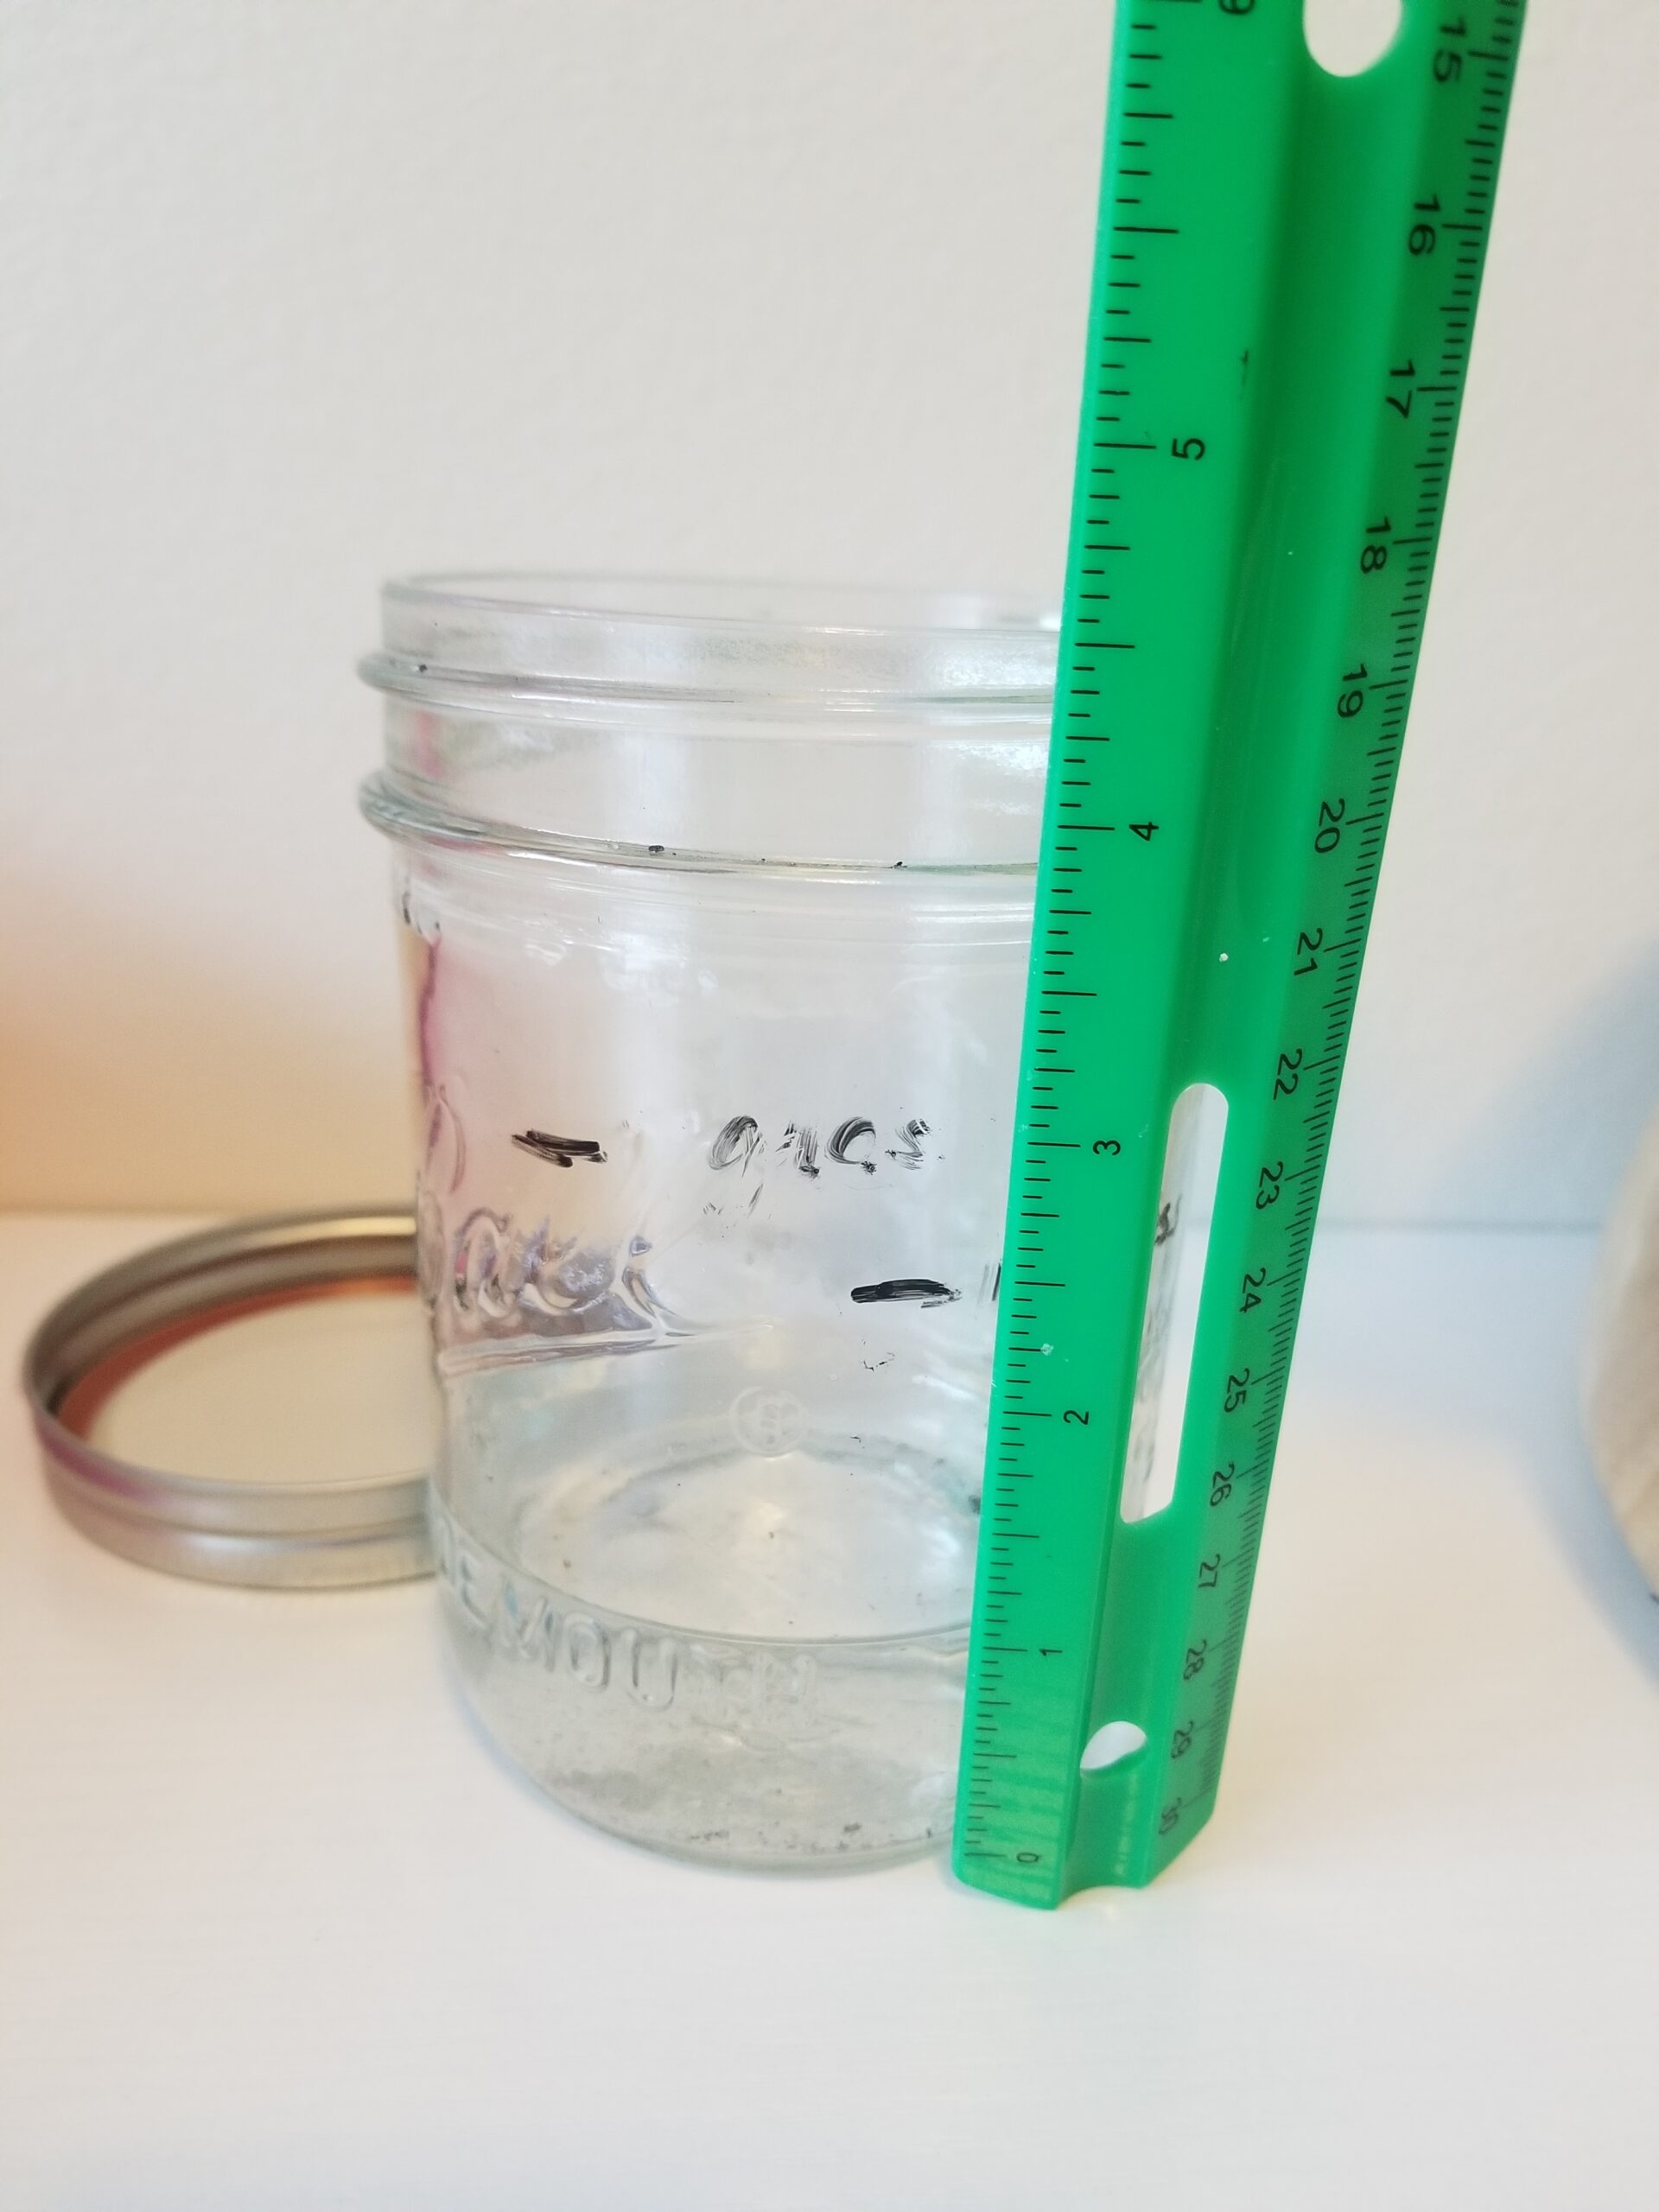
How Much Water Is In Snow?
Did you know that 1 inch of rain is equivalent to 13 inches to snow! You can see for yourself in this super simple experiment.
Supplies Needed:
- Ruler
- Clear jar
- Snow
- Dry erase marker
- Paper and pencil
Step-by-Step:
- Fill the jar with snow. Pack it down so it’s pretty solid.
- Measure the height of the snow using the ruler and write down the inches on a piece of paper.
- Ask your child to make two different predictions. One – how much water they think will be in the jar when the snow all melts (they can mark their prediction on the jar using a dry erase marker) and two – how long they think it will take for all the snow to melt.
- Come back periodically to check your results!