Creating art that can be hung on the Christmas tree is a wonderful way to spend time together and create memories during the holiday season. Homemade ornaments also make great gifts that will be treasured year after year by those who receive them.
There are lots of homemade ornament ideas out there, unfortunately too many of them aren’t actually kid-friendly to make, and are so complicated that they end up looking nothing like the inspiration picture.
If you are looking for ornaments that are easily kid made, while looking oh-so-cute (even if they aren’t perfect) you’ve come to the right place.
Check out these simple, sentimental, and adorable ornament ideas below:
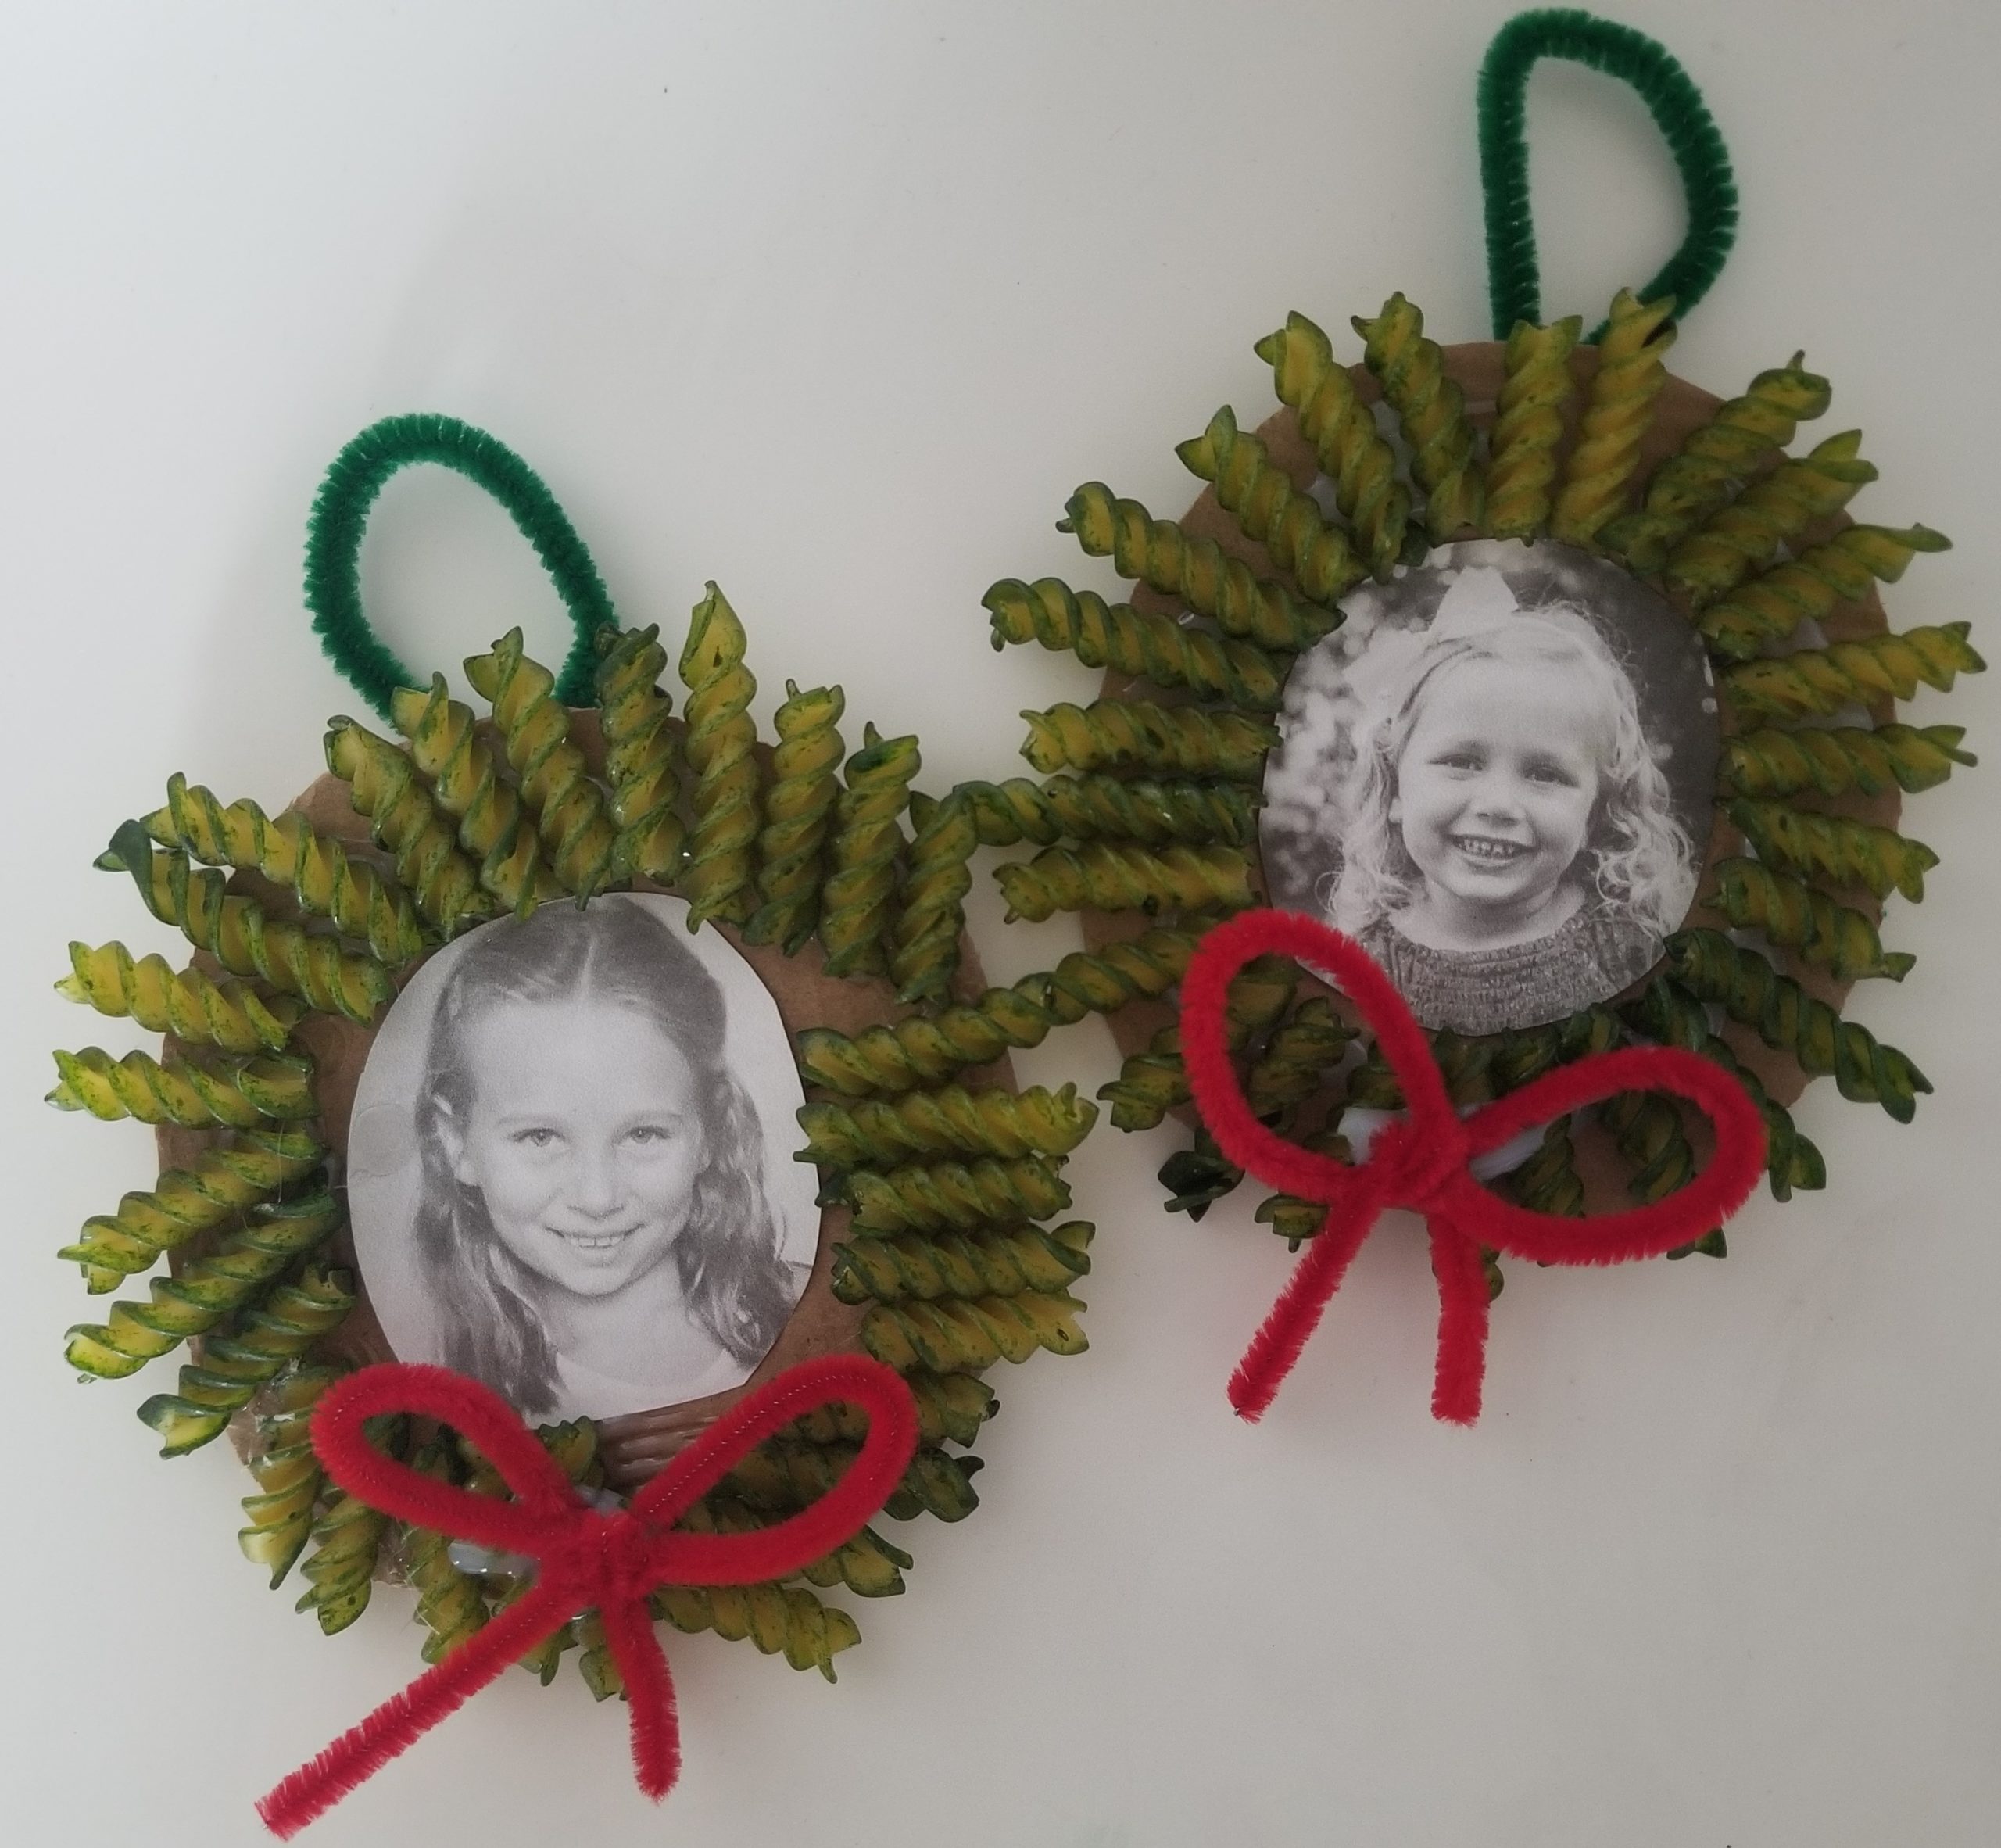
Noodle Wreath
Supplies:
- Small paper plate
- Green and red food coloring
- Dry rotini noodles
- Dry bow tie noodles
- Craft pom-pom balls (optional)
- Photo
- Ziploc bags
- Glue
- Ribbon
Step-by-Step:
- In one Ziploc bag pour dry rotini noodles and a few drops of green food coloring. Seal the bag and let you child mix until all the noodles turn green. Pour the noodles out of the bag and lay them on a paper towel to dry. Do the same process with the bow tie noodles and red food coloring.
- Cut your photo into a circular shape and glue it to the center of the paper plate.
- Once the noodles are dry, glue them in a circular shape around the outside of the paper plate, framing your photo.
- Glue a red bow tie noodle to the bottom of the wreath to look like a bow.
- Add pom-poms or any other decorative elements if desired around the wreath.
- Tape or glue a ribbon to the back to hang on your tree.
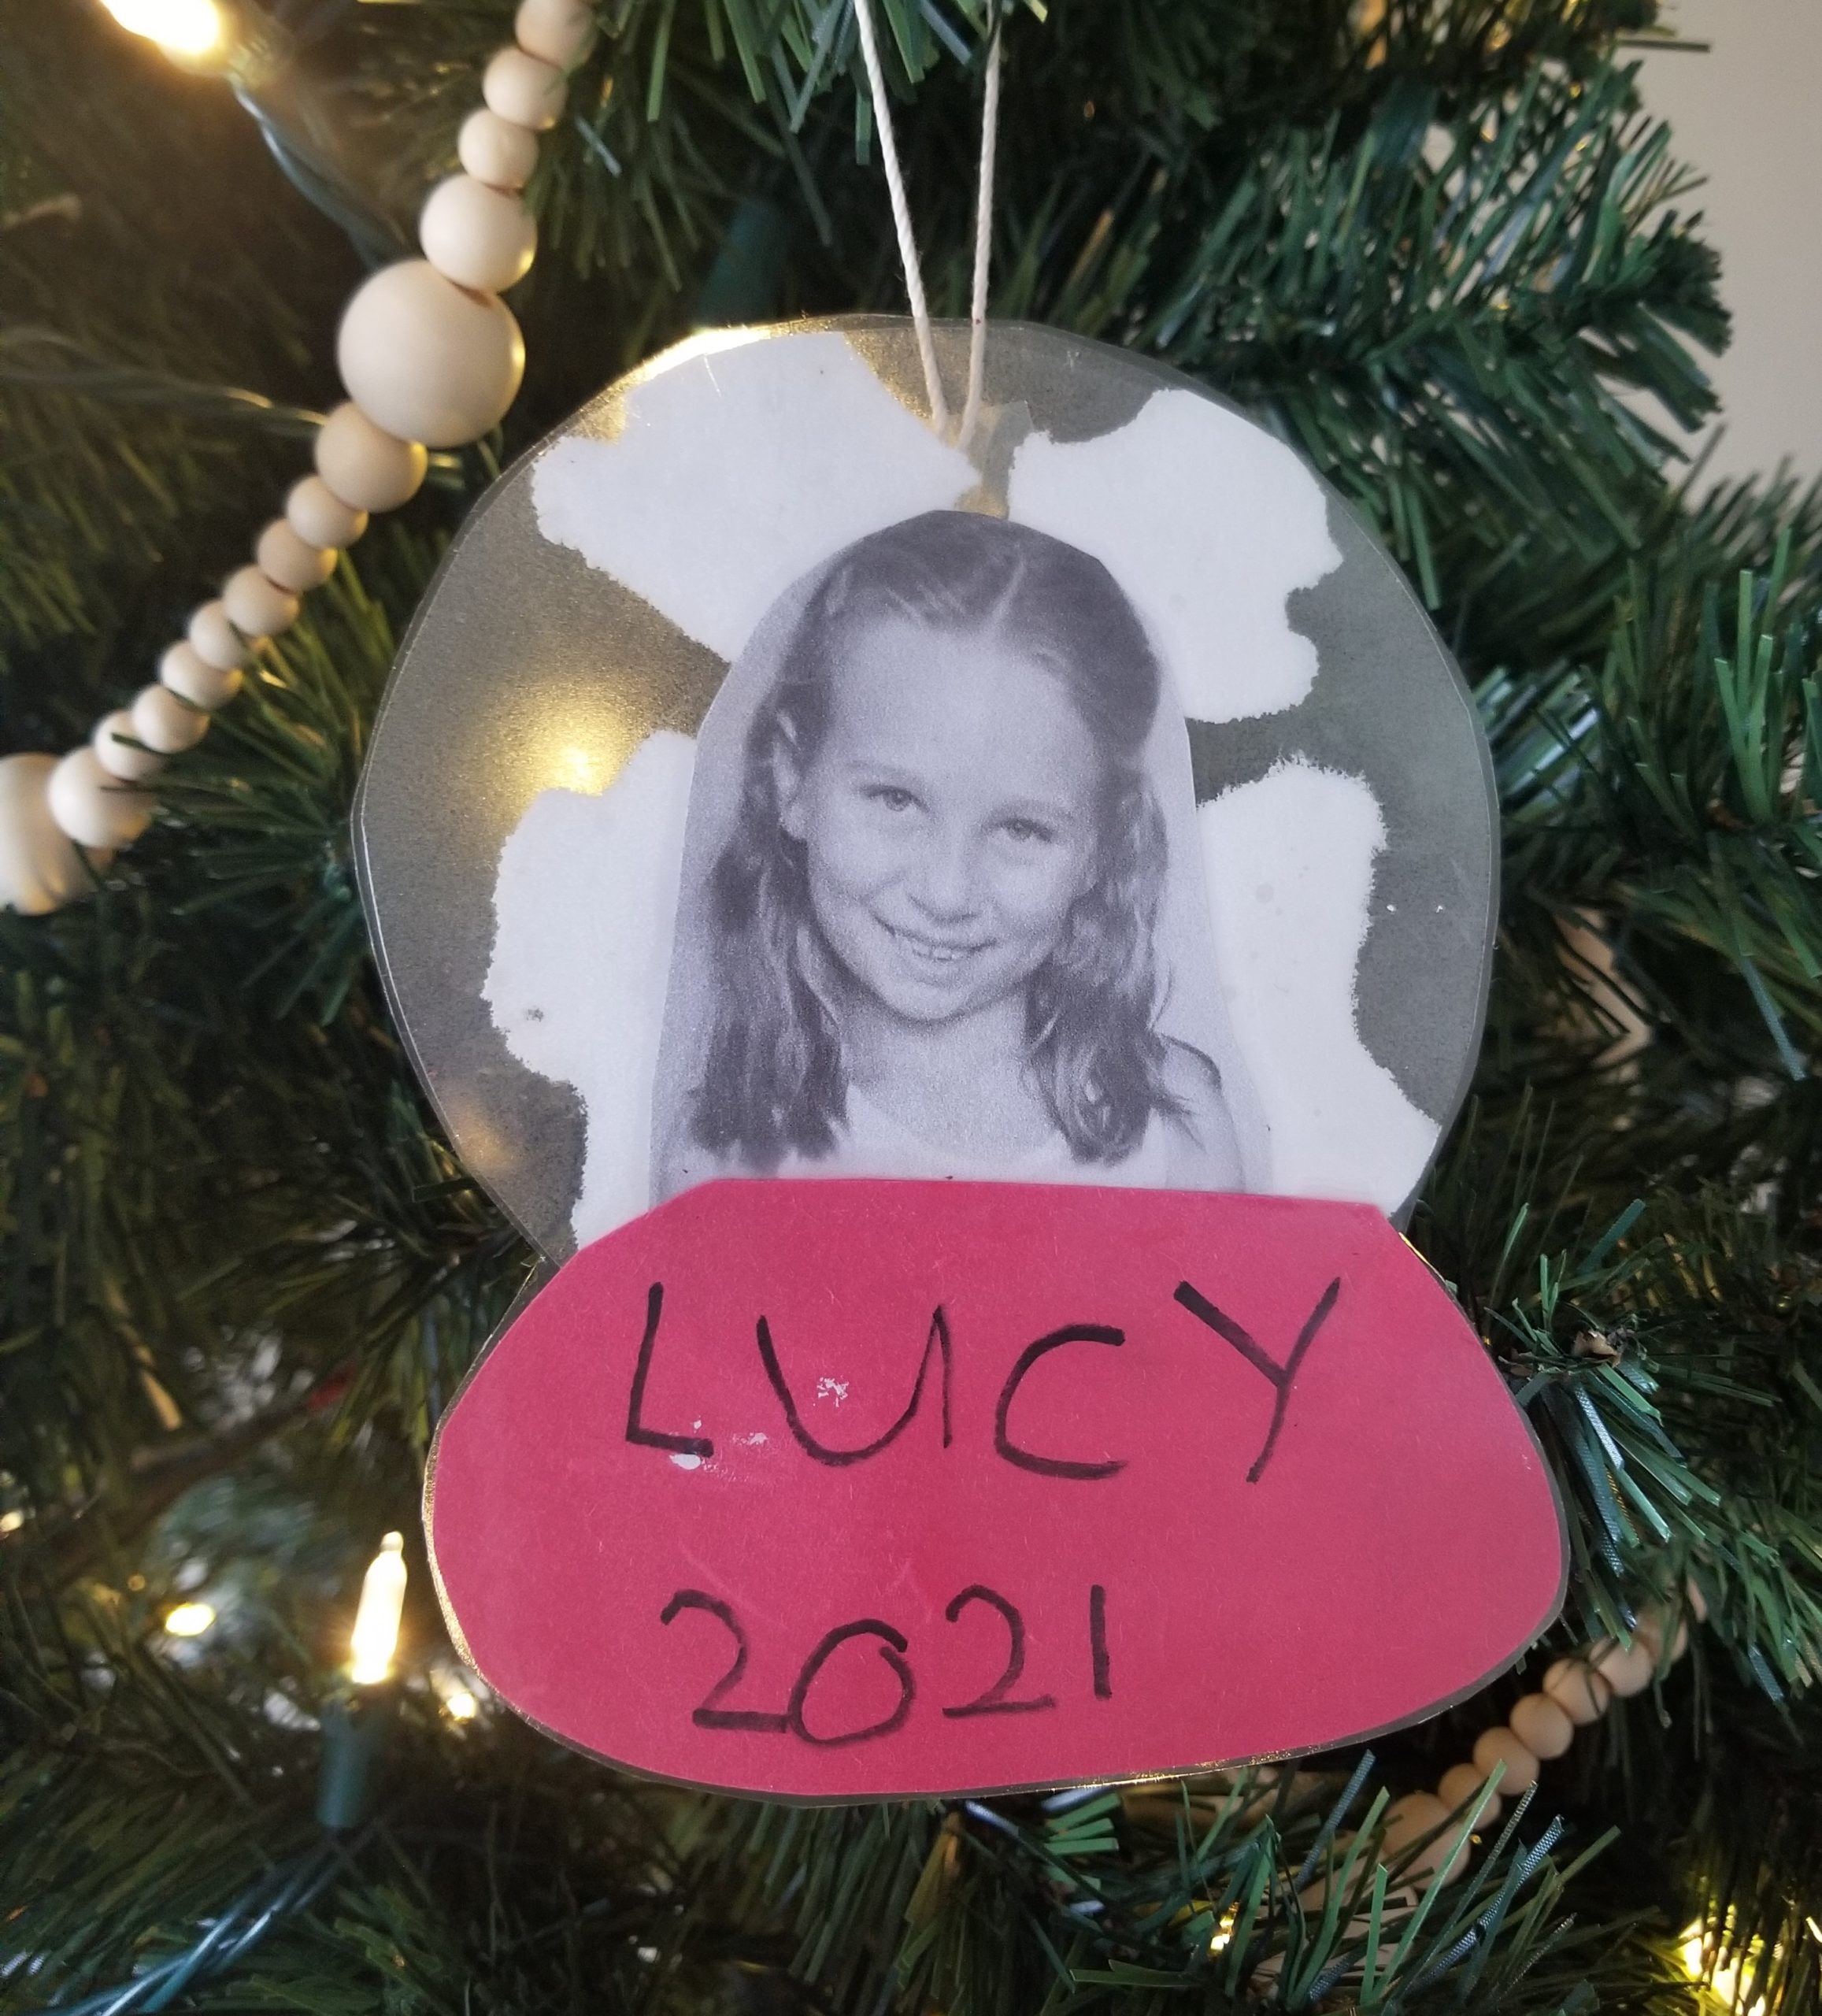
Snow Globe
Supplies:
- Contact paper
- White paint
- Scissors
- Photo
- Construction paper
- Markers
Step-by-Step:
- Print and cut out photos of your child.
- Cut three identical circles out of contact paper.
- Squirt dots of white paint on one of the sticky sides. Next, put a second contact paper circle with its sticky side down so the paint is sandwiched in the middle.
- Place the cut out photo of your child on top of the circle, and place the final contact paper circle on top of the photo sticky side down, so all three layers are stuck together.
- Cut out your snow globe bottom shape and glue to the contact paper.
- Tie yarn or sting to the snow globe so it can be hung on a tree.
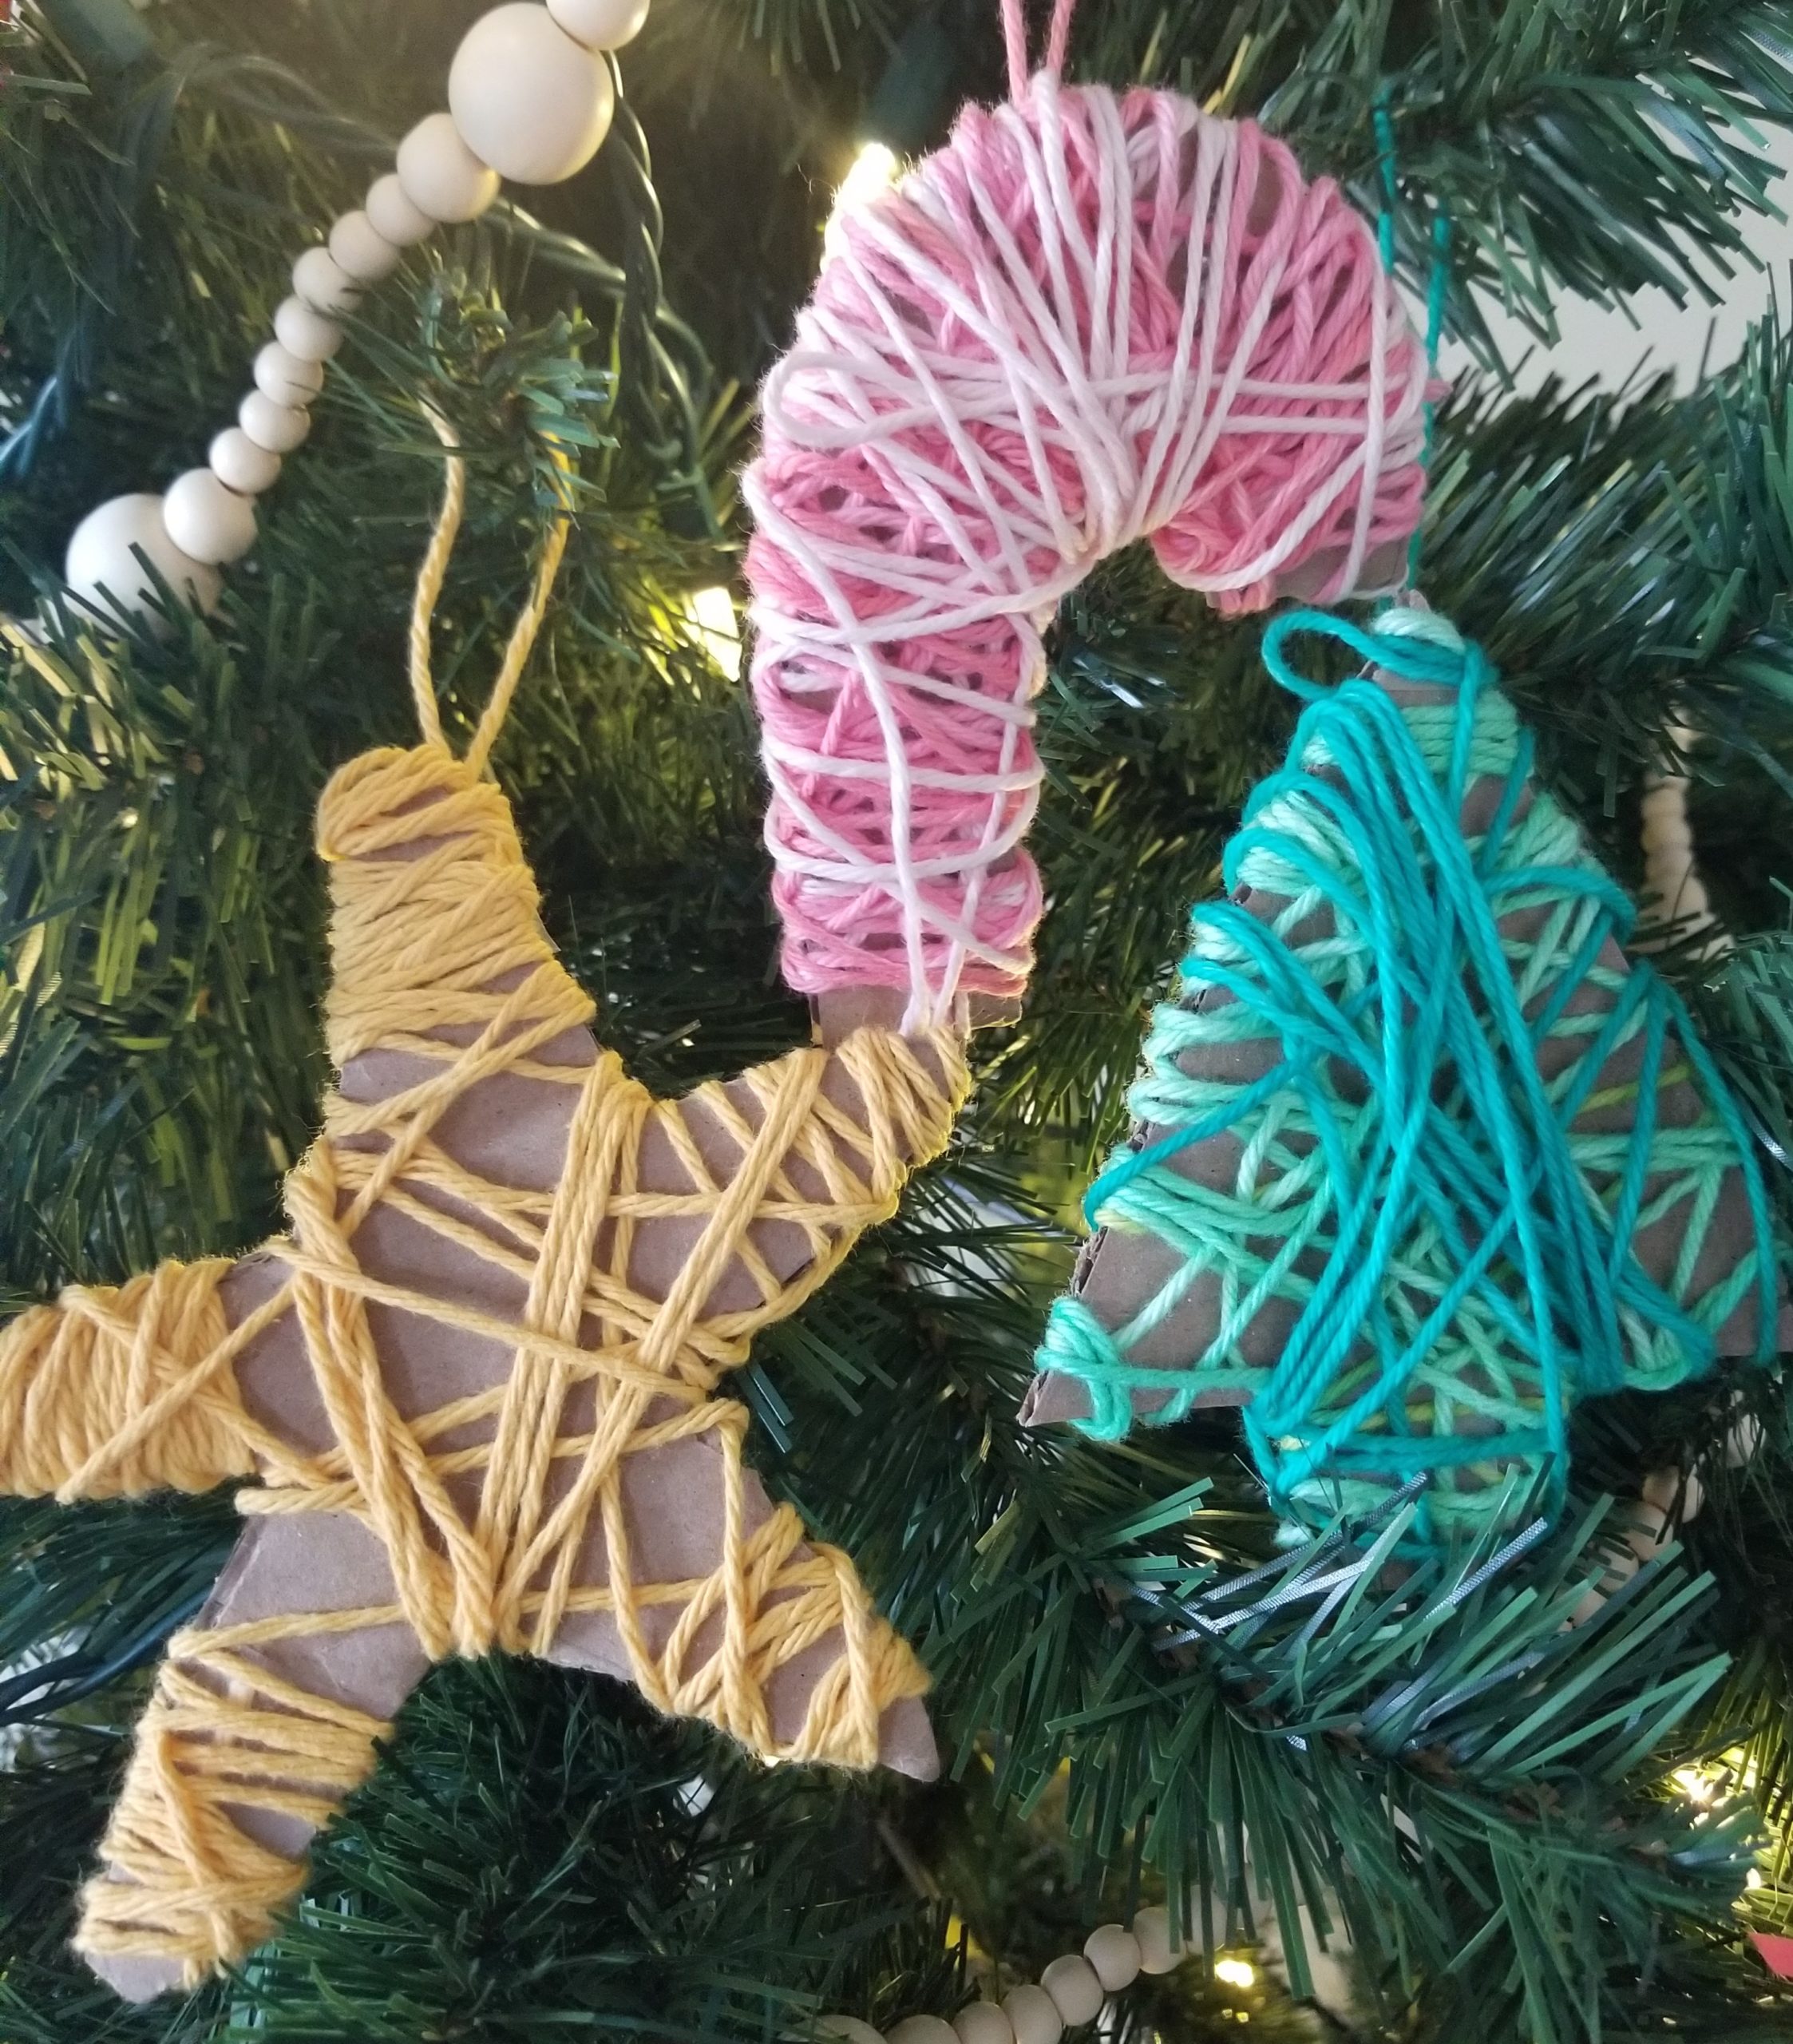
Yarn Shapes
Supplies:
- Scissors
- Plain cardboard
- Yarn
- Tape
- Paint (optional)
Step-by-Step:
- Decide what shapes you want to make your ornaments, and cut them out of the cardboard. (You can paint the cardboard, but leaving them natural brown looks great too.)
- Tape a piece of yarn to a spot of the backside of the cardboard.
- Next, wrap the yarn around the shape in different directions until you are satisfied with the look.
- Knot the yarn at the end to make a hook for hanging.